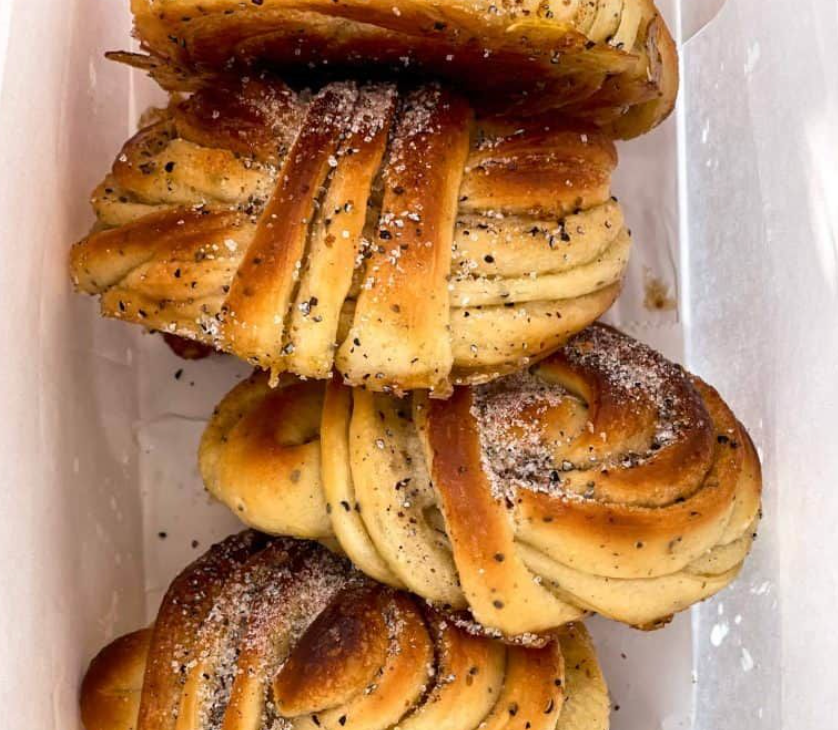
Large, fluffy Scandinavian-style cardamom buns. Soft enriched dough, lots of freshly ground cardamom, a generous brown butter filling, and crunchy pearl sugar on top.
Makes: 12 large buns
Ingredients
Dough
- 300 ml whole milk, lukewarm, about 36°C
- 25 g fresh yeast, or 8 g instant dry yeast
- 75 g sugar
- 1 large egg
- 550 g strong white bread flour, preferably Manitoba or high-protein flour
- 2 tbsp freshly ground cardamom
- 1 tsp fine salt
- 100 g soft butter, cut into cubes
Brown Butter Cardamom Filling
- 180 g butter, to be browned
- 150 g light brown sugar
- 2 tbsp freshly ground cardamom
- 1 tsp vanilla sugar, or 1 tsp vanilla extract
- 1 generous pinch fine salt
Topping
- 1 beaten egg, for brushing
- 4–6 tbsp pearl sugar / Swedish nib sugar
Method
1. Make the dough
Warm the milk until lukewarm, around 36°C. Crumble the fresh yeast into the milk and stir until dissolved.
Add the sugar, egg, flour, cardamom and salt. Mix on low speed until the dough comes together, then knead for about 5 minutes.
Add the soft butter a little at a time while the mixer runs. Continue kneading for 8–10 minutes on medium speed, until the dough is smooth, elastic and slightly glossy. It should pull away from the sides of the bowl and stretch thin without tearing
2. First rise
Cover the bowl with a damp cloth or plastic wrap.
Let the dough rise at room temperature for 1–1½ hours, or until almost doubled in size.
For the best flavour and easiest shaping, you can instead let the dough rise slowly in the fridge overnight after a short 30-minute rise at room temperature.
3. Make the brown butter filling
Melt the butter in a saucepan over medium heat. Let it bubble and foam until the milk solids turn golden brown and the butter smells nutty.
Pour the brown butter into a bowl, scraping in the browned bits. Let it cool until soft and spreadable — not liquid.
Mix the cooled brown butter with the brown sugar, cardamom, vanilla and salt until you have a smooth, thick paste.
The filling should be spreadable but not runny. If it feels too soft, chill it for 5–10 minutes.
4. Roll out the dough
Turn the dough out onto a lightly floured surface.
Roll it into a large rectangle, about 40 x 50 cm, and roughly 3–4 mm thick.
Spread the filling evenly over the dough, all the way to the edges.
5. Fold and cut
Fold the dough like a letter:
Bring the bottom third up over the middle, then fold the top third down over it.
Press gently to even it out. Roll very lightly if needed to flatten the folded dough.
Cut into 12 equal strips.
6. Shape the buns
Take one strip and gently stretch it slightly.
Twist it 2–3 times, then wrap it around two or three fingers in a loose knot or figure-eight shape. Tuck the end underneath.
Place the buns on baking trays lined with parchment paper, leaving plenty of room between them.
7. Final proof
Cover the buns lightly with a clean cloth.
Let them proof for 45–60 minutes, until visibly puffy, soft and airy.
Meanwhile, preheat the oven to 220°C conventional or 200°C fan.
8. Brush and top
Brush the buns gently but thoroughly with beaten egg.
Sprinkle generously with pearl sugar. Be generous — the crunchy sugar is the finish.
9. Bake
Bake in the middle of the oven for 9–12 minutes, until deeply golden but still soft inside.
Do not overbake them. They should have colour, but the centre should stay tender and fluffy.
Let them cool slightly on a rack before serving.
They are best eaten warm the same day.
Notes for the best result.
Use freshly ground cardamom from whole green pods if possible. Crush the pods, remove the husks, then grind the black seeds.
Use strong flour. In Italy, Manitoba flour is a very good choice.
The brown butter must cool before mixing with the sugar. If it is liquid, the filling will leak out too much.
Do not rush the final proof. The buns should feel light and puffy before baking.
Bake hot and fast. That gives colour and caramelisation without drying them out.
Freeze leftovers the same day and reheat at 160°C for 5–7 minutes.
Share on socials:
Sourdough Crackers
Simple Sourdough Pizza Recipe
8 comentarios
Hej
Kommer der snart en udførlig beskrivelse af processen?
Mvh. Jonas
“Snart” er otte måneder senere?
Hej, jeg vil gerne lære at lave disse, men venter tålmodigt på fremgangsmåden…
Hele fremgangsmåden kommer snart?! det er 6 måneder siden, så hvornår er snart?
Hvornår kommer fremgangsmåden? Lavede dejen i går og lod den hæve ved stuetemperatur, inden den kom på køl natten over.
Har lige smurt remonce på og foldet og snurret bollerne sammen. Skal de hæve inden de skal ind og ved hvilken temperatur?
Med venlig hilsen
Kim Johansen